I recently got a Corne split keyboard, as I was facing some wrist pain due to a lot of typing (lifting is more to blame).
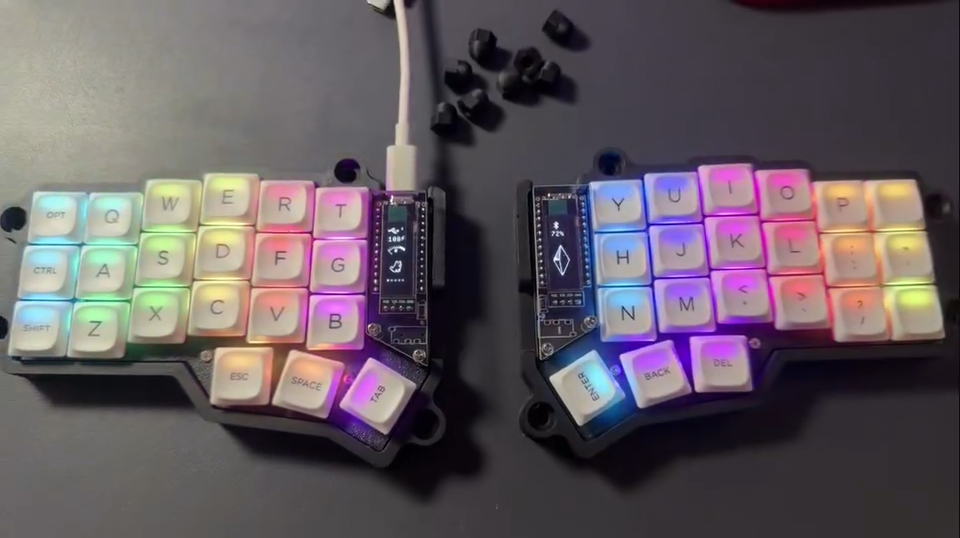
But when I finally tried typing with it, I realized how much I was going to miss the number row, the symbols and special characters. That meant I could design a keyboard layout 100% tailored for me.
So I got to work.
Design philosophy
Set the goals up front, build a first version, use it for a few weeks, then fix whatever hurts.
Goals:
- Transitioning from a regular QWERTY keyboard should be easy.
- Numbers and symbols should be accessible in the same layer.
- Shifted symbols1 should not require pressing two modifiers (layer + shift).
- No home row mods2.
- Navigation layer3 should mimic vim motions.
0. Base layer

I didn’t want to make any changes to the base layer (qwerty), which helped me reach ~80% of my regular typing speed in about a week.
1. Nav layer
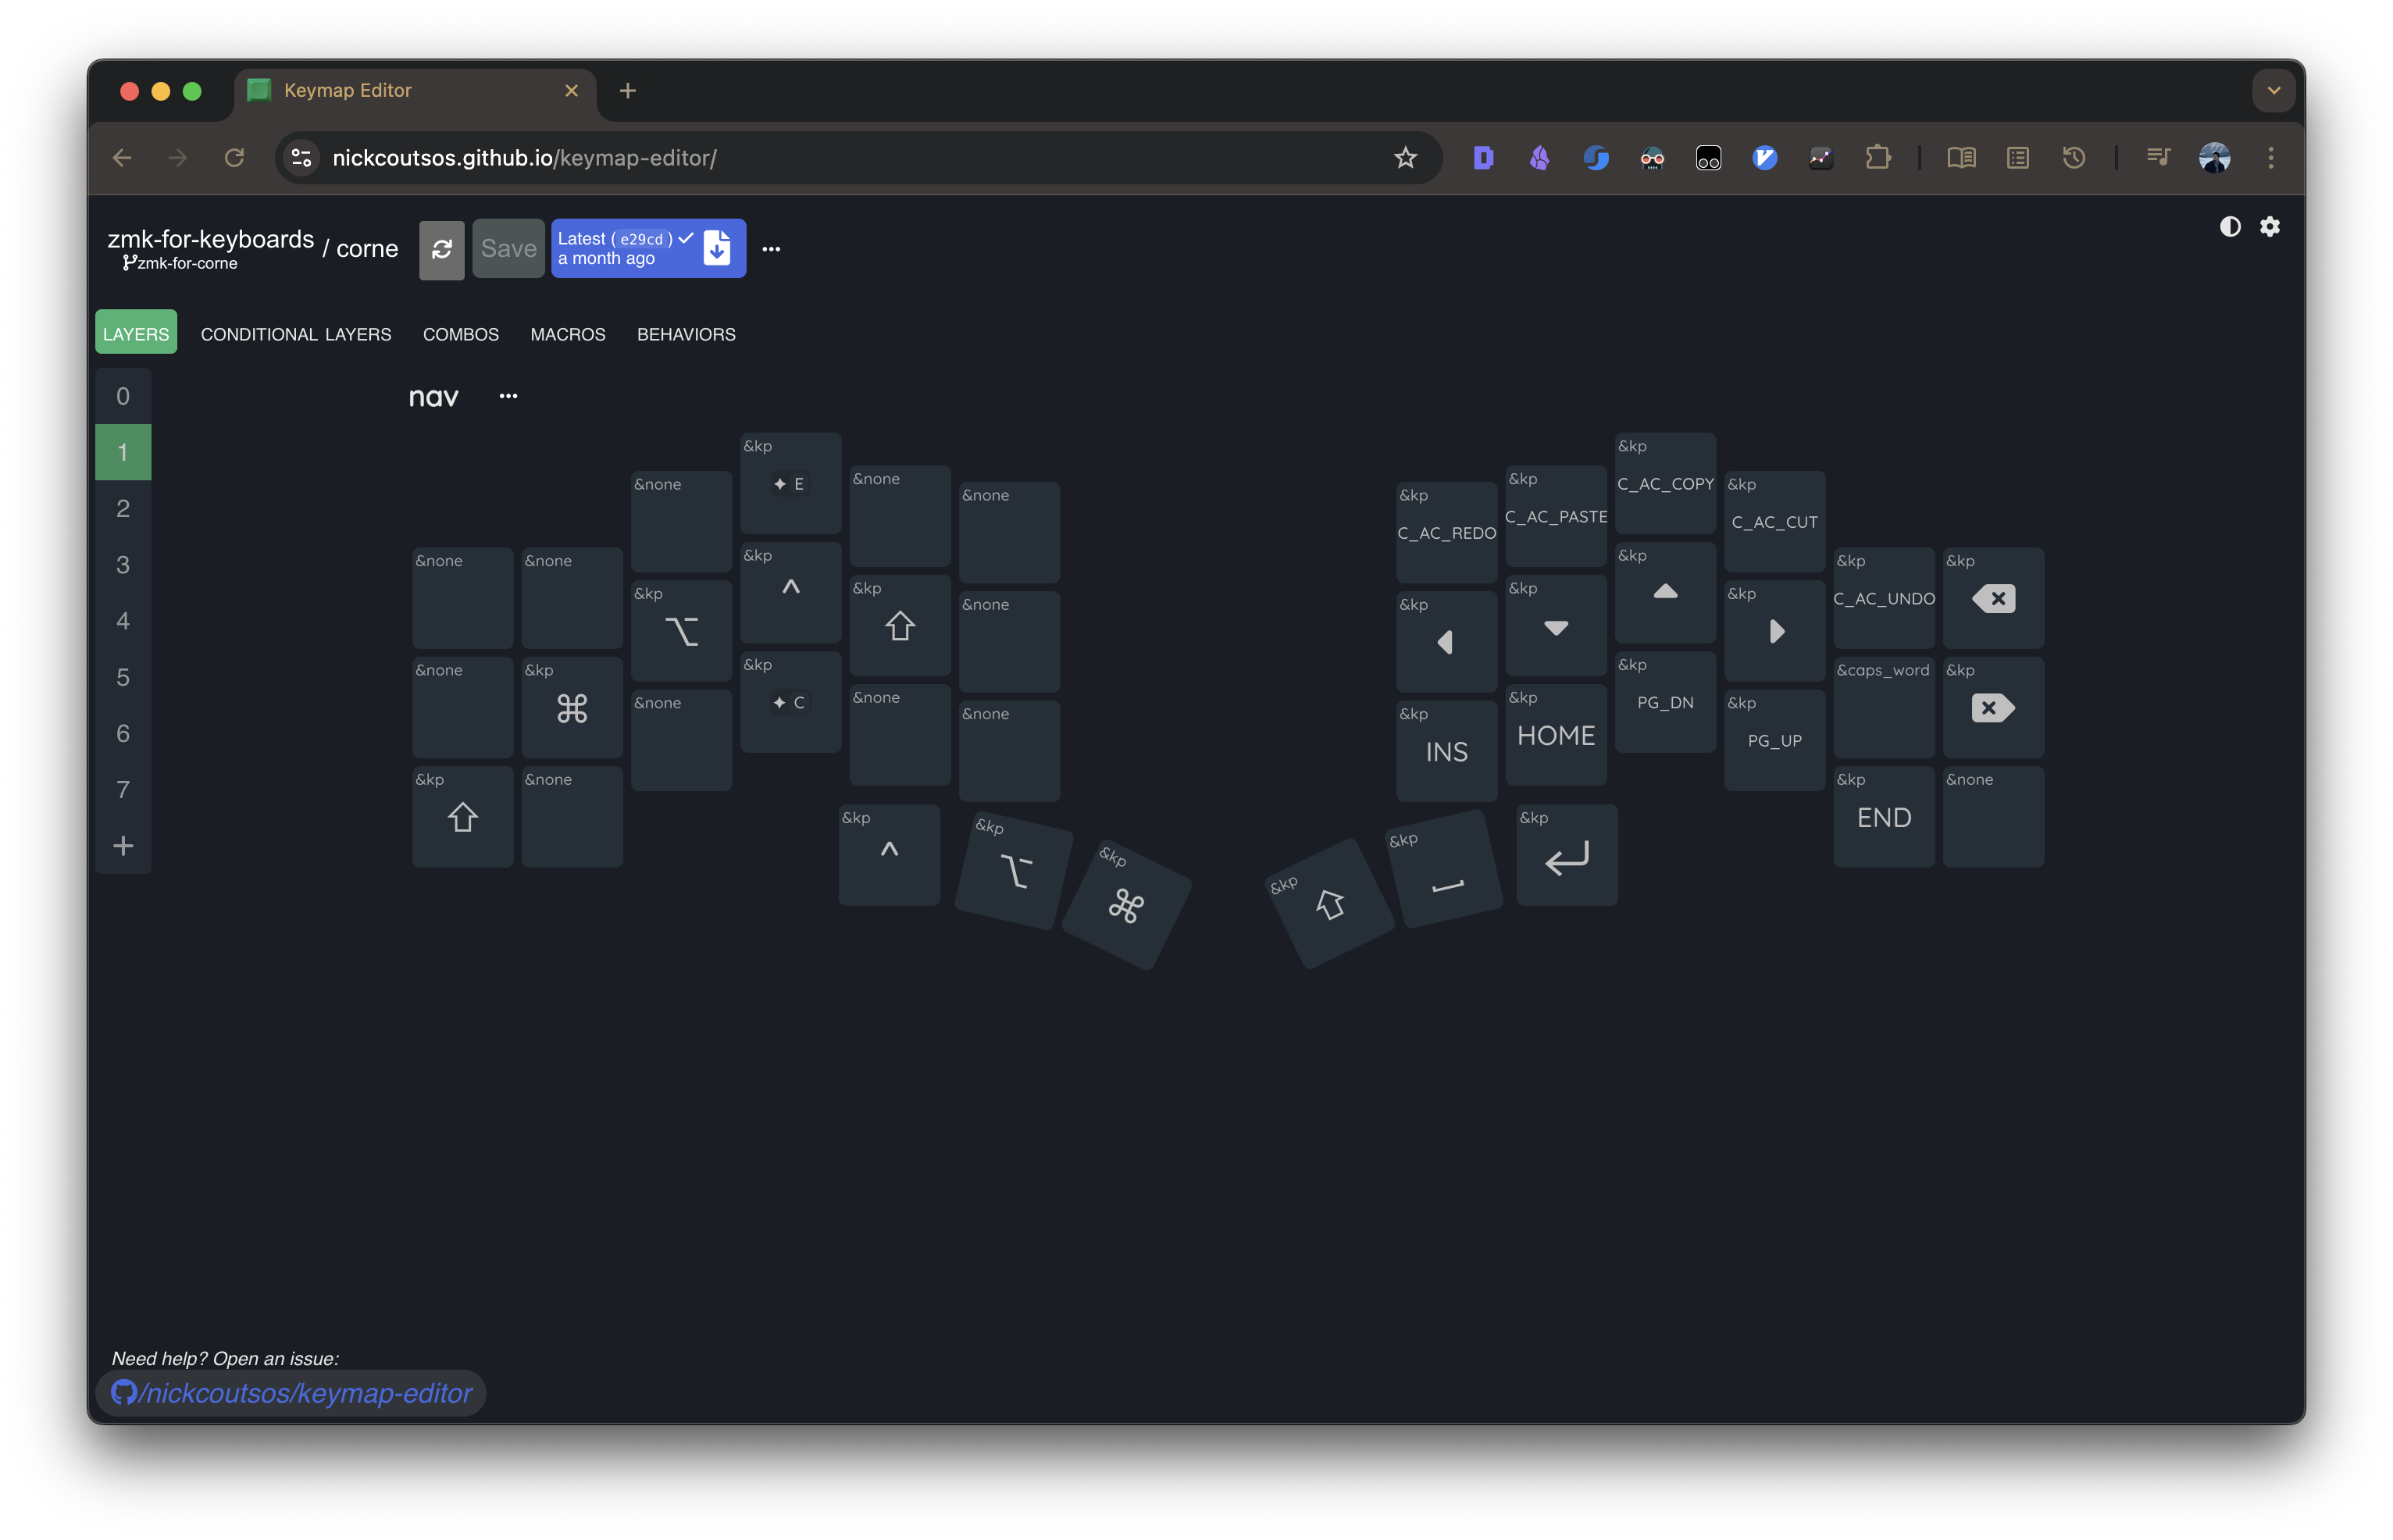
Arrow keys go on h, j, k, l. Vim motions are second nature.
Home, Page Up, Page Down, and End live on the right-hand third row.
Home and End go to index and pinky—intuitive opposites.
Page Down is on the middle finger because I use it frequently. That leaves Page Up for the ring finger.
Caps Word sits on the pinky on the second row.
2. Num layer
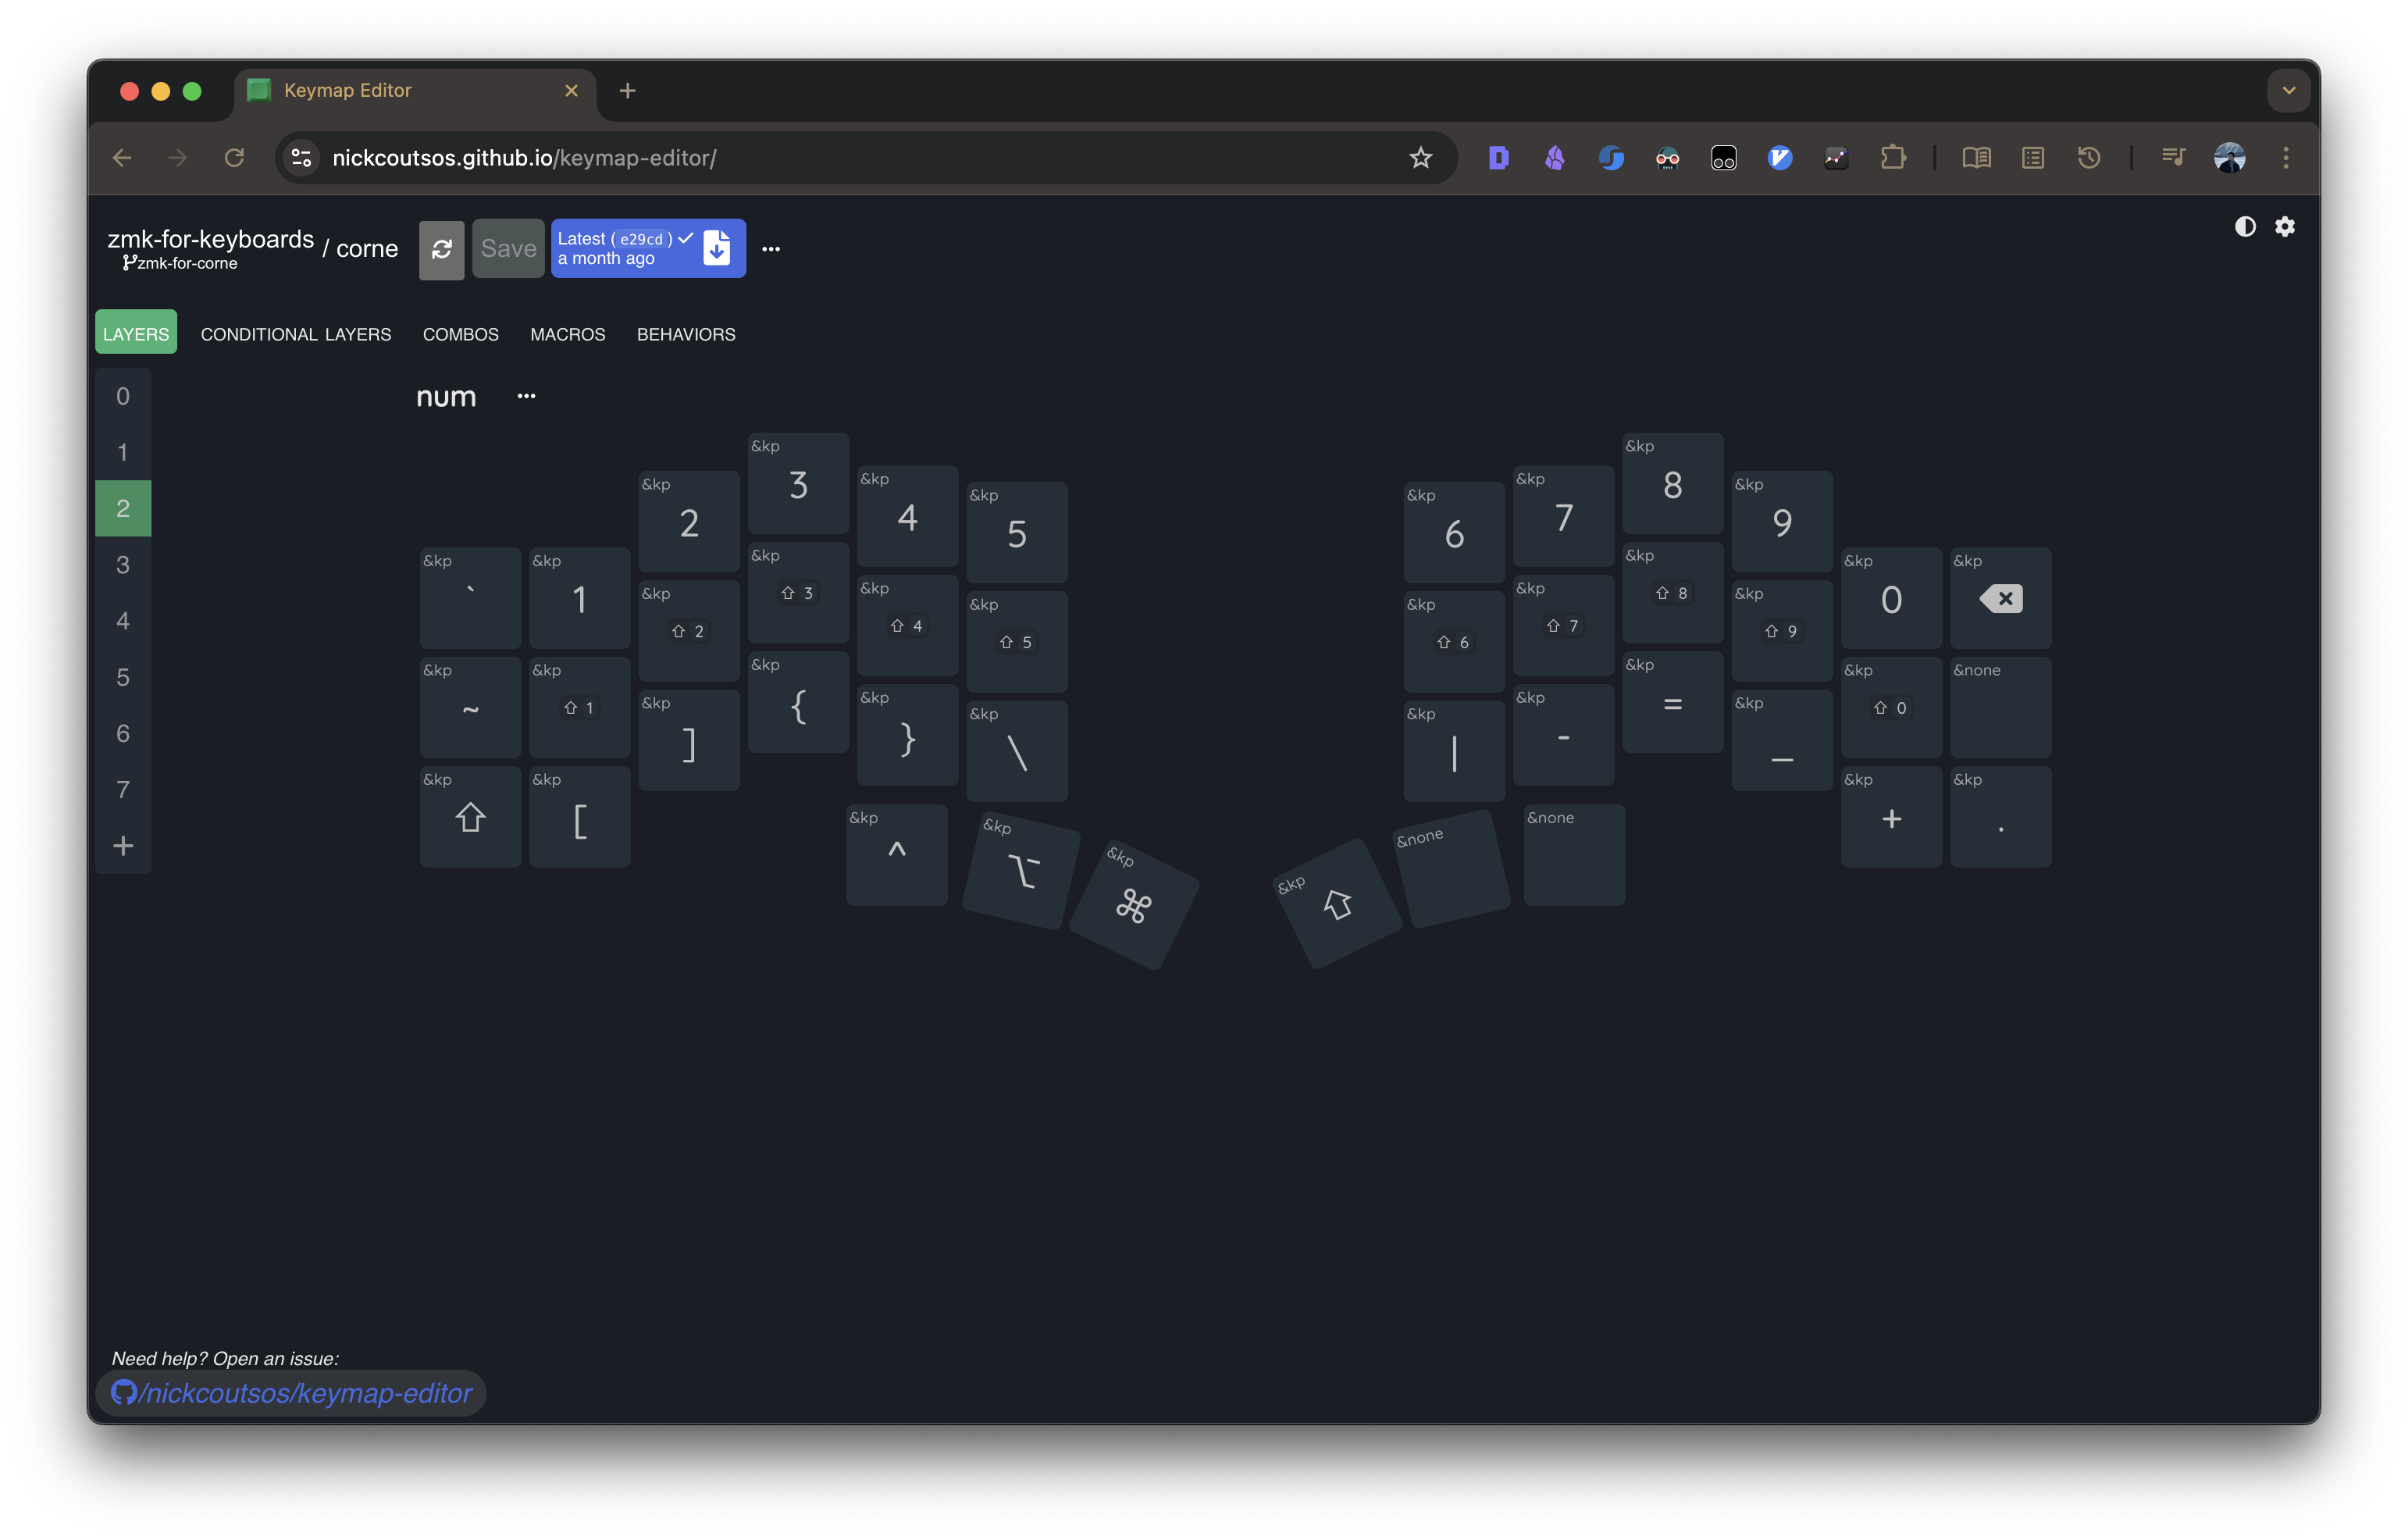
This was the hardest layer to design.
Goals and constraints:
- Numbers and symbols live on the same layer.
- Each key uses the same finger as on a regular keyboard, making switching stress-free.
Num row vs num pad
Easy decision. I needed something close to a laptop layout, so I went with the num row.
Num row symbols and special characters
Because I didn’t want to hold two modifiers for special characters, using the shifted num row was not an option.
To keep finger assignments consistent with a traditional keyboard—and maintain the number-to-symbol pairing—I placed the symbols on the second row.
Tilde and backtick sit on the leftmost keys of row 1 and row 2. Arbitrary choice.
Remaining characters were:
- Brackets
- Braces
- Plus
- Minus
- Equals
- Underscore
- Pipe
- Backslash
Brackets and braces usually appear as pairs. I placed them together on the left side on the third row. This is a drastic change because both the finger and the hand differ from a standard keyboard.
Plus, minus, equals, and underscore also form natural pairs, so I placed them on the right-hand third row.
Pipe and backslash went to the innermost keys on the third row. Another arbitrary placement.
3. Function layer
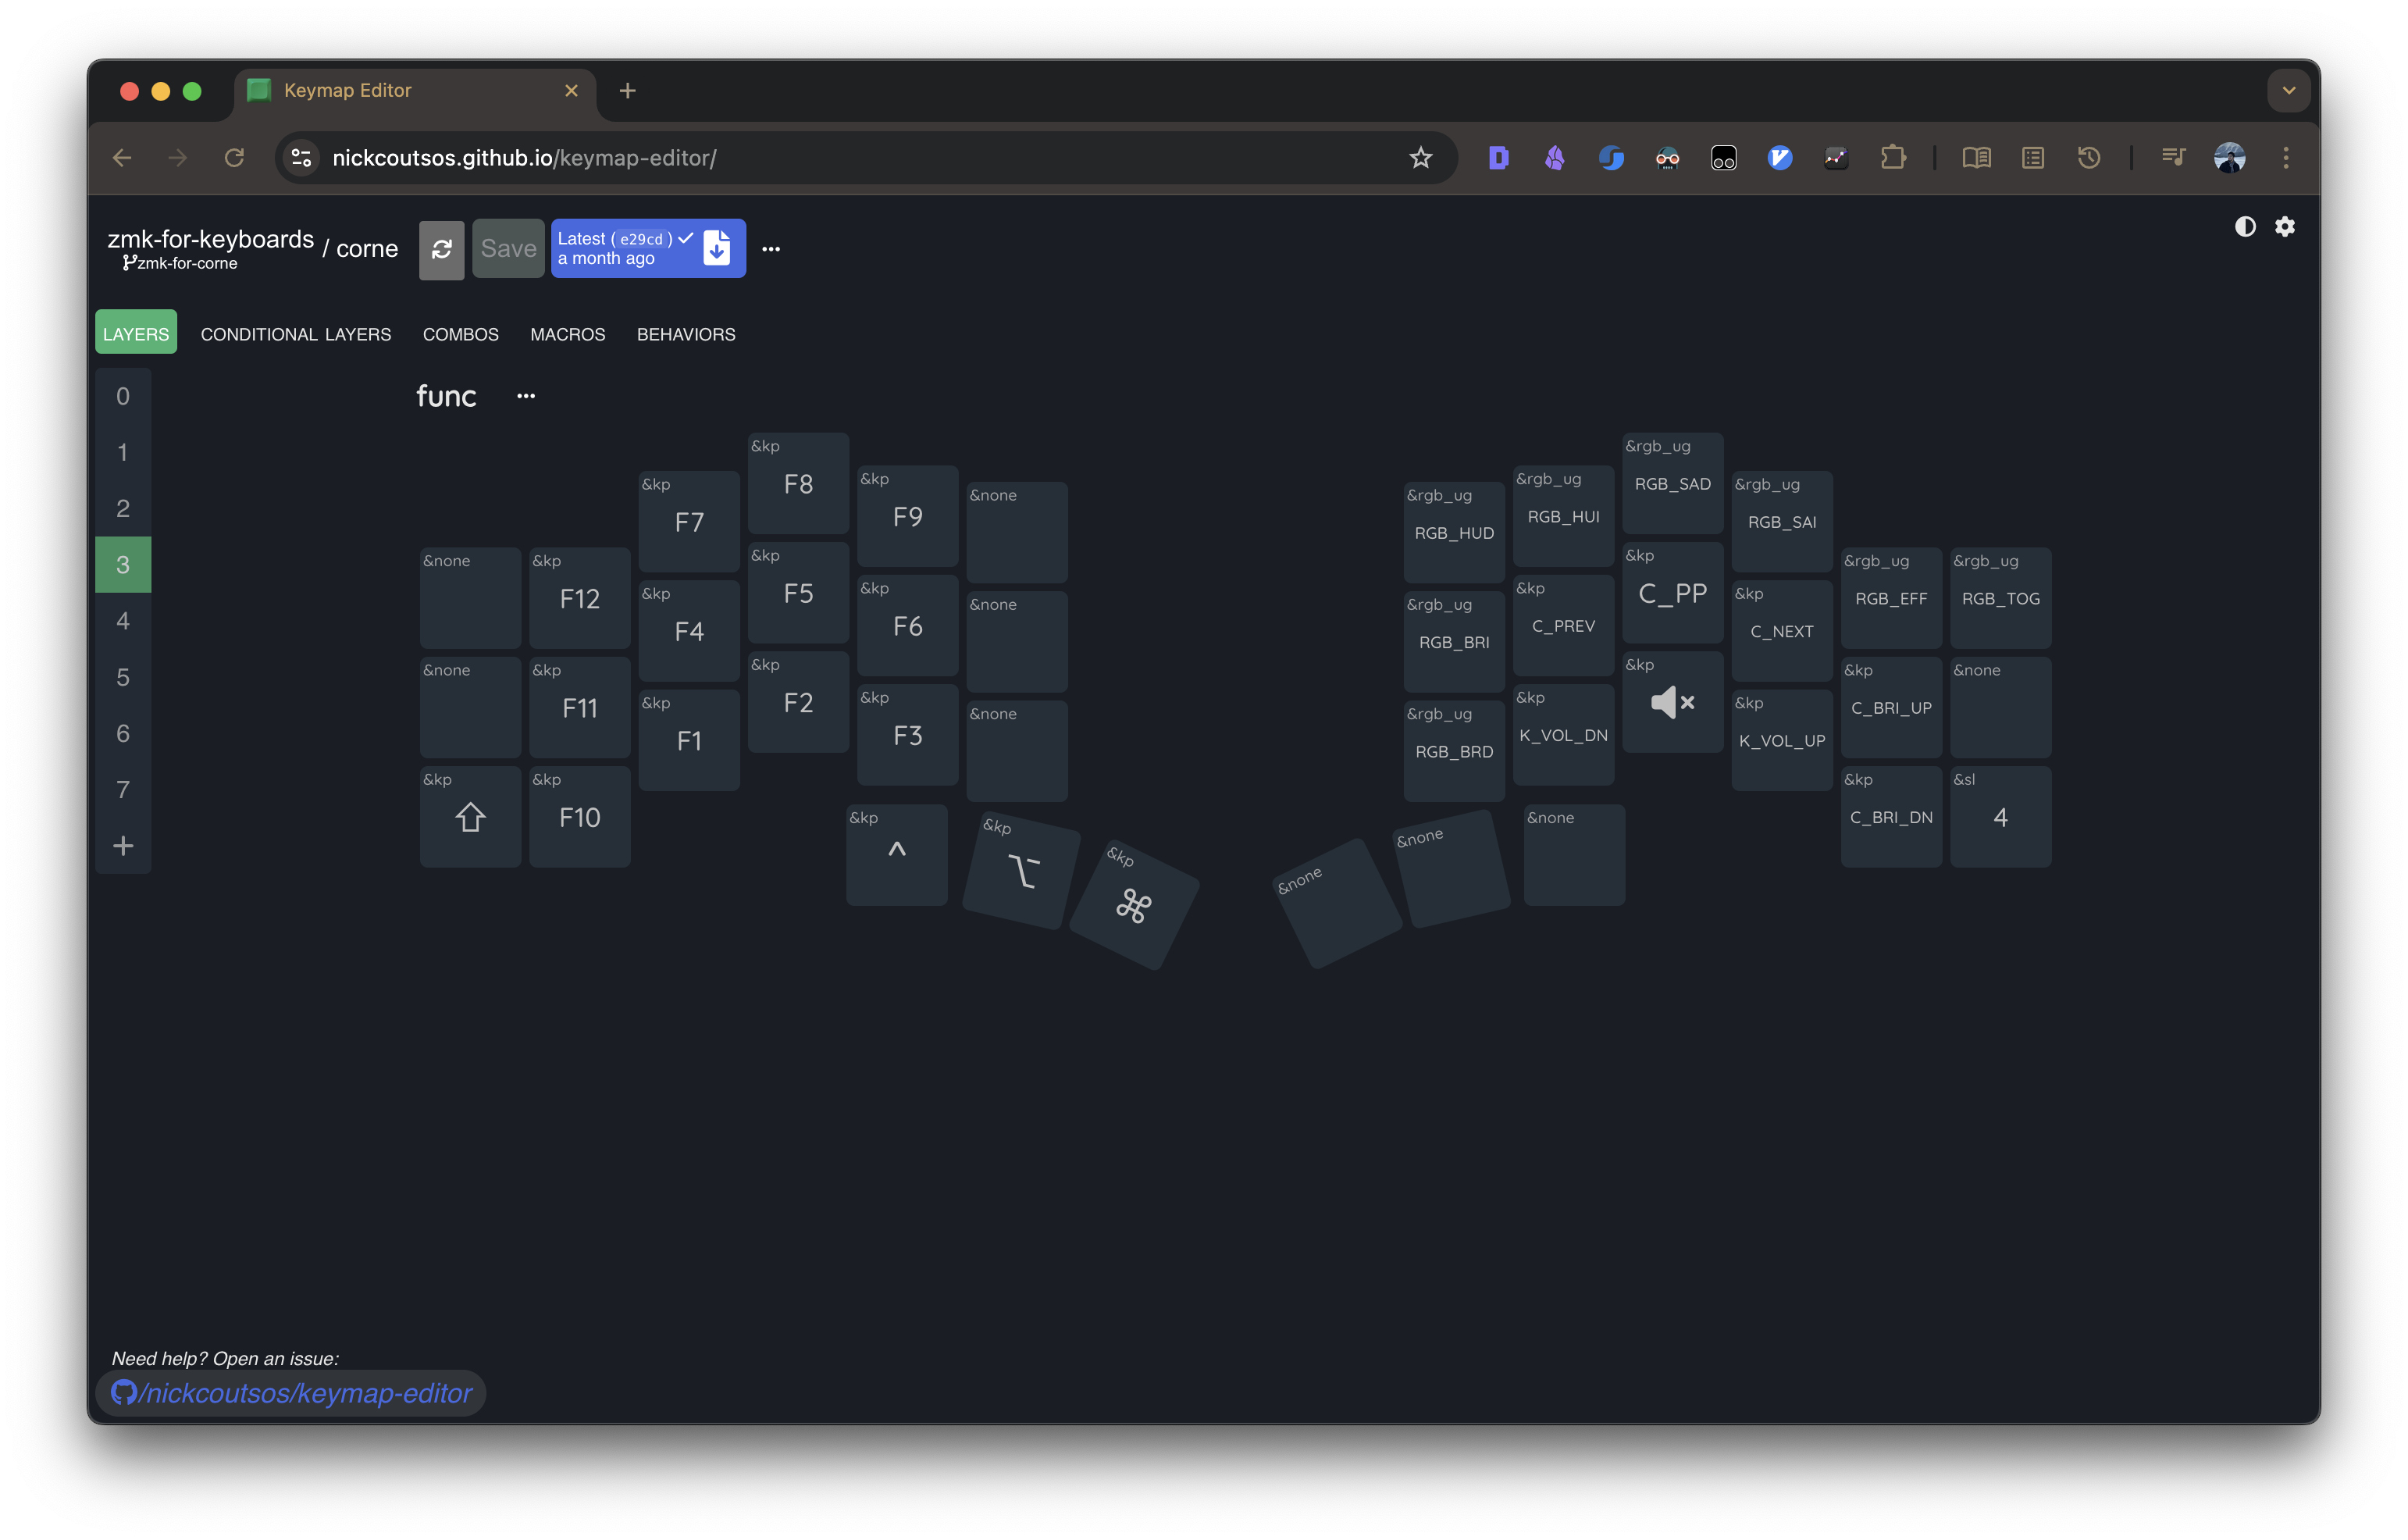
This layer is mainly for function keys. I don’t use them often, but they’re useful when needed.
It also handles media control, brightness, and keyboard settings (RGB brightness, color, effect, etc.).
I chose a numpad-style layout for the function keys on the left hand.
Media, brightness, and keyboard controls go on the right hand.
For media controls, I needed matched finger usage:
- Previous Track + Volume Down
- Play/Pause + Mute
- Next Track + Volume Up
I placed each pair in the same column on the second and third rows. Track controls get the second row for faster access.
Screen brightness needs only two keys, so I put them on the pinky column: row 2 for brightness up, row 3 for brightness down.
Keyboard RGB: top-right key toggles RGB. Effect key to the left of it. Brightness sits on the first column, rows 2 and 3. Hue and saturation (two keys each) go in pairs on the first row. Hue first because I change color more often.
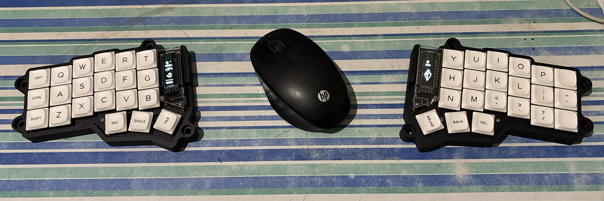
4. Mouse layer

This layer isn’t meant to replace a mouse completely. It’s a supplement for quick, simple tasks.
Mouse movement uses h, j, k, l.
Scrolling uses the same fingers one row below.
Mouse clicks need three keys. The right-hand thumb cluster4 is perfect:
- Primary thumb = left click
- Secondary left thumb = right click
- Secondary right thumb = middle click
Using the thumb cluster4 also enables click-and-hold for drag and drop.
5. Bluetooth layer
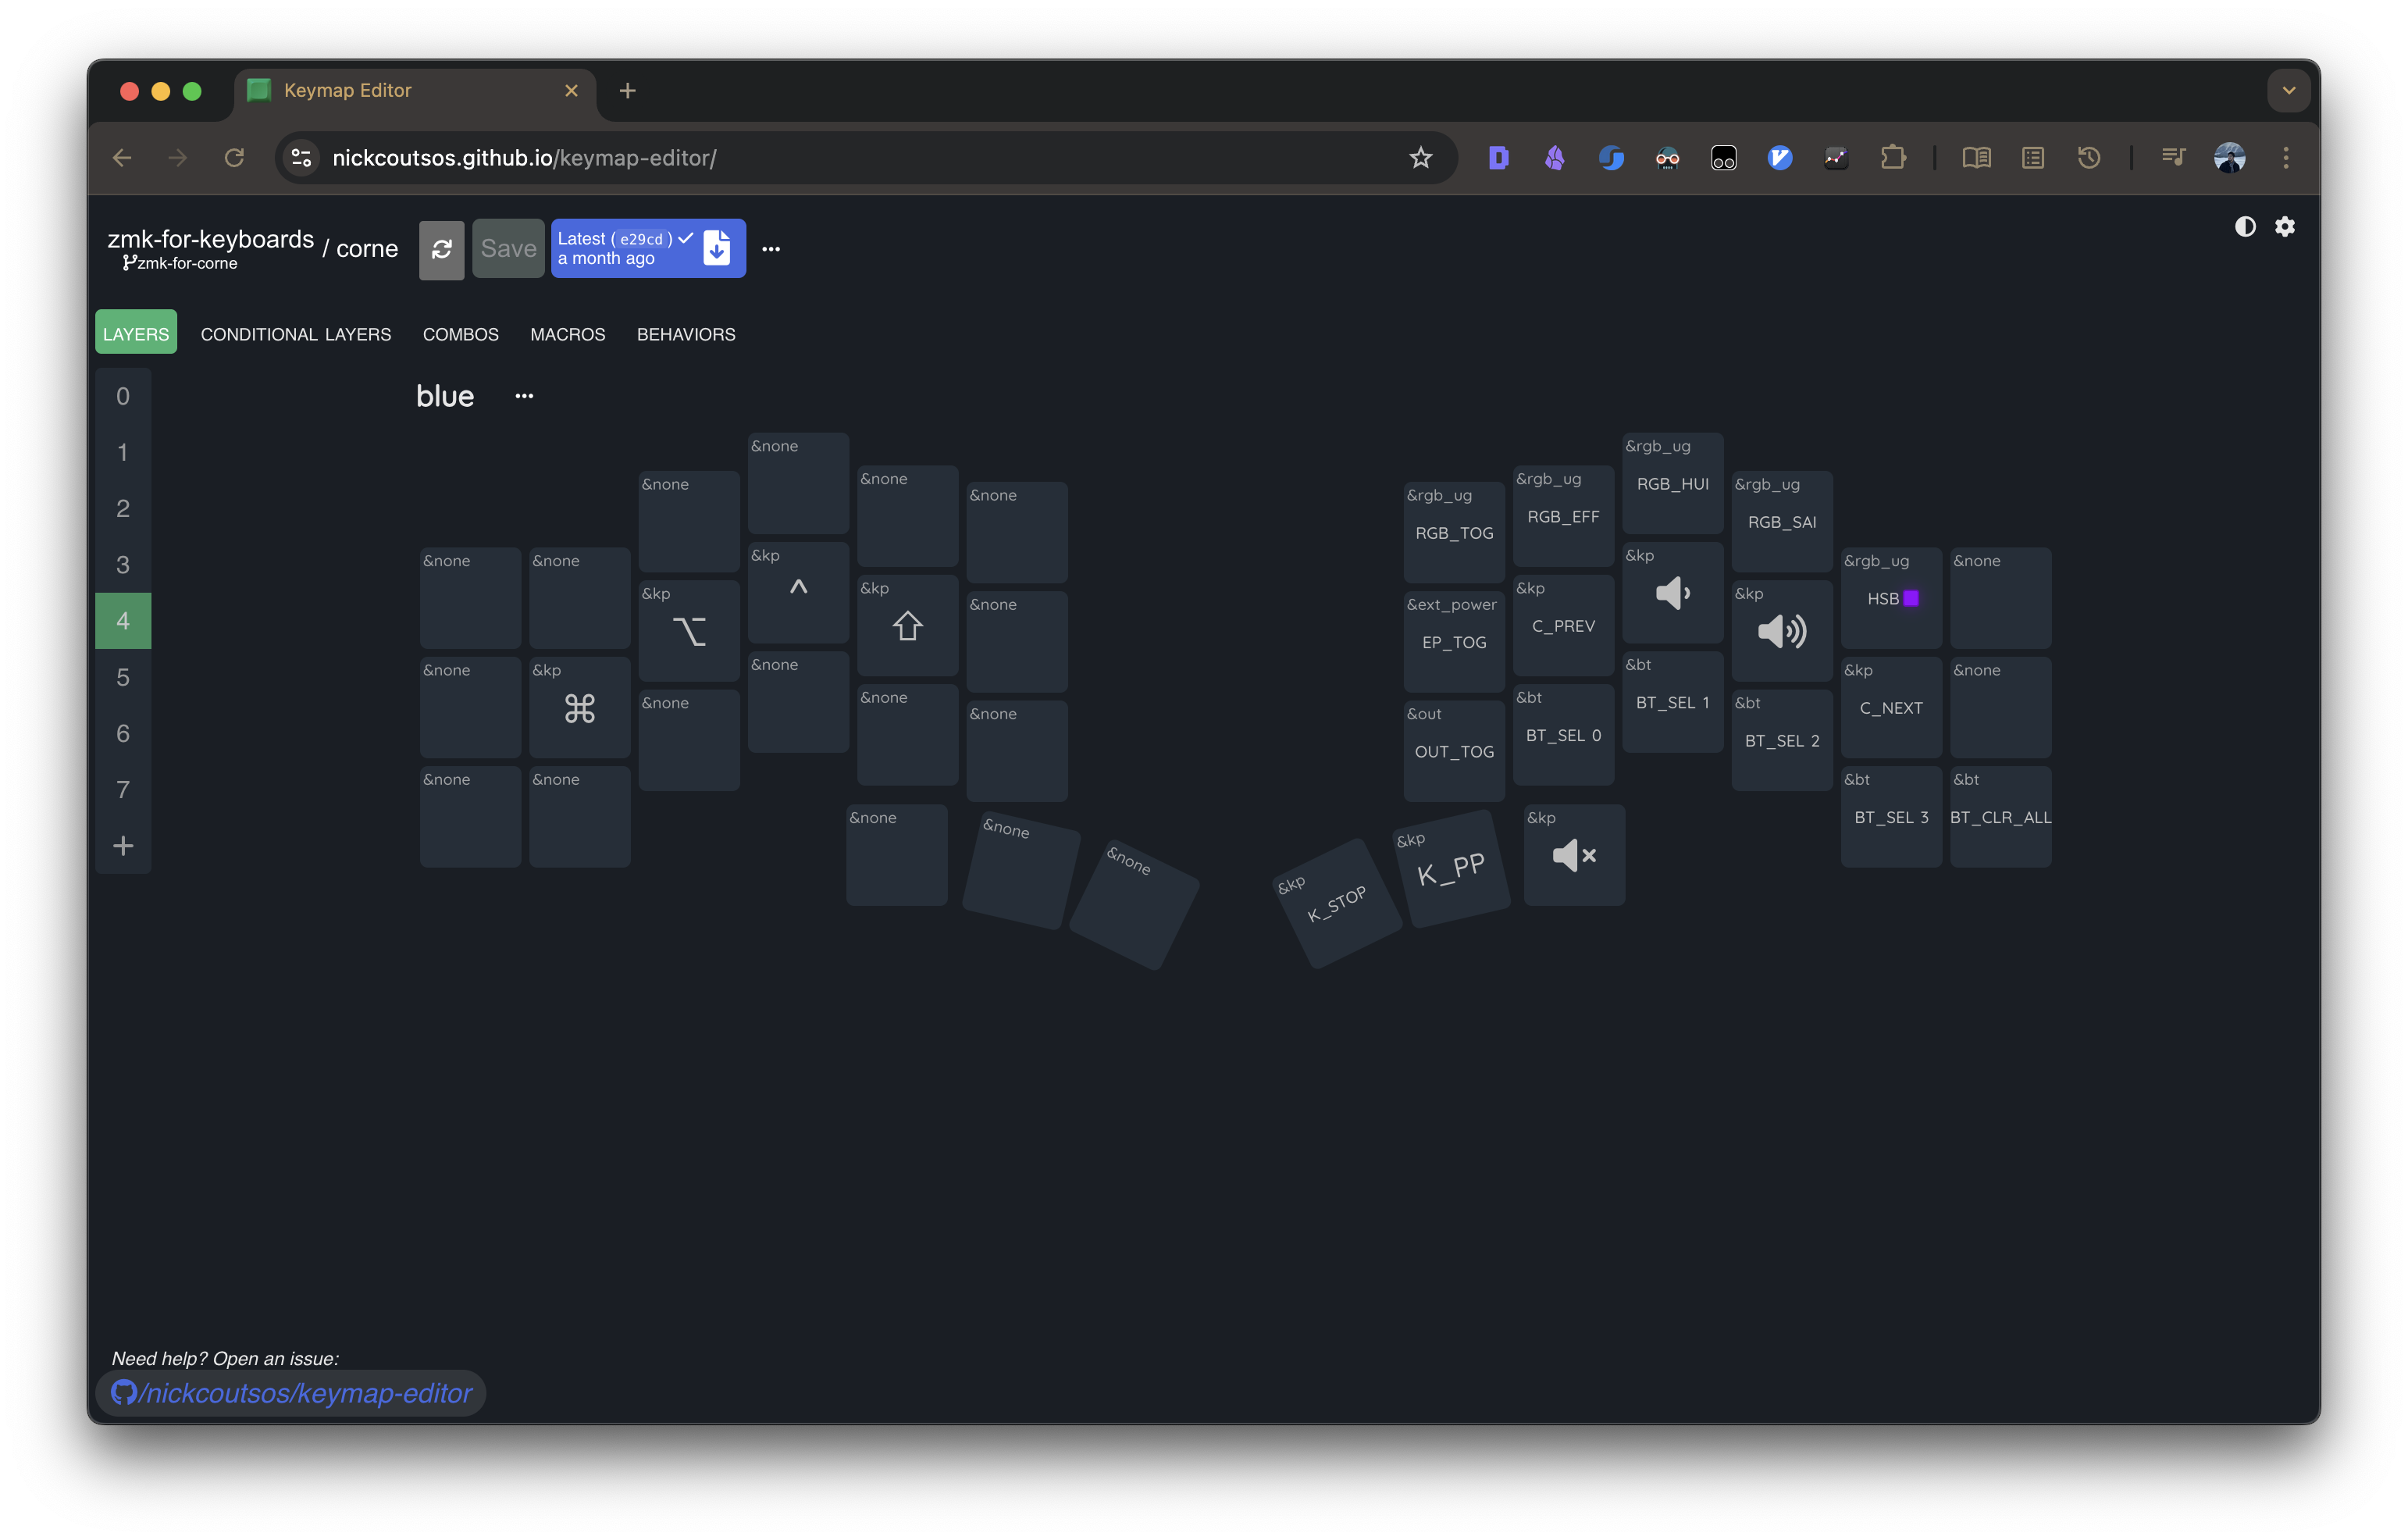
Straightforward. Four profile keys and one clear key. All on the right-hand third row. Entering this layer requires a complex chord.
Modifiers
I wanted no home row mods. I’ve tried them on a regular keyboard and kept triggering mods while typing fast.
So I put the main modifiers (Control, Option, Command) on the left-hand thumb cluster4, following the MacBook layout. This keeps the transition smooth and ensures I always have access to them, which is critical for shortcuts like screenshots.
Shift needed to be on the thumb too so I can hold it without contorting my hand. It sits on the leftmost secondary key of the right thumb cluster4. I also needed a secondary Shift for shortcuts, so I put one on the left-hand bottom-left key.
Spacebar is the most-used key, so it lives on the primary right thumb key. Tap = space, hold = num layer. 5
Enter is on the rightmost secondary right thumb key. Tap = enter, hold = function layer.
Escape is leftmost on the second row with a tap-hold that leads to the nav layer.
Tab is top-left on the left hand.
Backspace is top-right on the right hand.
What can be improved
Mouse movement has no acceleration. It becomes annoying fast.
Conclusion
Designing a layout for a split keyboard is a fun process and the result is tailored to how you actually work. I don’t want to fall down the configuration rabbit hole, so I’ll stick to this layout until something breaks. Then I’ll redesign based on real problems.
Resources
- My keyboard configuration: https://github.com/Chaitanya-Shahare/zmk-for-keyboards
- Keymap editor UI: https://nickcoutsos.github.io/keymap-editor/
- Firmware: https://zmk.dev/
Shifted symbols: Characters produced by holding Shift and pressing a number key, such as
! @ # $ % ^ & * ( ). When using layers, these often require both a layer key and Shift unless specifically redesigned. ↩︎Home row mods: A technique where the home-row letters (ASDF / JKL;) act as modifiers like Ctrl/Alt/Shift when held, but produce normal characters when tapped. Popular in ergonomic keyboards, but easy to trigger accidentally. ↩︎
Layer: A virtual “keyboard mode” that remaps keys to different functions. Split keyboards rely heavily on layers to replace missing physical keys such as function rows, arrows, and symbols. ↩︎
Thumb cluster: A set of thumb-accessible keys on ergonomic keyboards, used for high-frequency actions like Space, Enter, Shift, or layer toggles, reducing strain compared to stretching fingers for them. ↩︎ ↩︎ ↩︎ ↩︎
Tap-Hold: A dual-function key. A quick tap sends a normal keypress (like Space), while holding the same key activates another behavior (such as entering a layer). ↩︎